I am a newbie and am trying to build a small lab to be able to survey the protection ability of openziti against man-in-the-middle attacks (Of course, just to see how the ziti network is encrypted when devices communicate and access each other's services. Here, I use a win 10 virtual machine from the external network through a public router to be able to access the web of another virtual machine in the network that is building a web with a basic login interface with Xampp). I wrote a docx file but don't know how to post it here, so I'll probably post it in HTML format.
Index
- Deployment model
- Deploy Controller and router on Ubuntu server
- Ziti Admin Panel
- Login and use ZAC
- Add private router with OpenZiti quickstart network – Learning
Deployment model
Overview
Built with VMware workstation virtualization environment. All machines in the model are virtual machines!
- Web Server (Internal) and Windows 10 (Internal):
- Connect via VMnet 2 Host-Only Network. These machines can communicate with each other but cannot connect directly to the host's physical network or the Internet.
- Windows 10 (Outside) and Kali Linux:
- Connect to VMnet 8 (NAT Network). They can access the Internet through Ubuntu (Controller-Router) but cannot communicate directly with the physical network of the server.
- Ubuntu (Controller-Router):
- Ubuntu acts as Ziti Controller and Ziti Router, with 2 network cards:
- VMnet 2: Connect to Web Server (Internal) and Windows 10 (Internal).
- VMnet 8: Provides NAT for virtual machines like Windows 10 (External) and Kali Linux, allowing them to communicate with the Internet.

- Model idea:
- Build a controller and 2 edge routers (public and private) to allow machines using VMnet8 network cards through the Ziti network to access the web inside the internal network. All users will use the Ziti edge client to access the network (Ziti Desktop Edge). Use Kali to perform MITM attacks to eavesdrop (traffic and data are encrypted).
Deploy Controller and router on Ubuntu server
VMnet 8

VMnet 2

To make Ubuntu act as a router and provide NAT services to machines in the Bridged Network (with Internet connection), you need to enable IP forwarding and configure iptables:
- Enable IP forwarding:
sudo sysctl -w net.ipv4.ip_forward=1
- Configure NAT (Forwarding packets from virtual network to physical network):
sudo iptables -t nat -A POSTROUTING -o ens33 -j MASQUERADE
To install expressInstall and customize your environment, follow the steps below. Update and install necessary tools first:
sudo apt update && sudo apt install -y curl git build-essential gedit dbus-x11 tar hostname jq
Step 1: Create a public DNS name or use an IP
Ensure your machine has a public DNS name or is reachable via a public IP address.
- Generate DNS name: If available, use a public DNS name (e.g.,
hooangf4t.lab). Otherwise, use the machine's public IP address, obtained with:
curl -s eth0.me

- Change hostname permanently:
- Change the hostname using the
hostnamectlcommand:
- Change the hostname using the
sudo hostnamectl set-hostname hooangf4t.lab
- Edit the
/etc/hostnamefile:
sudo gedit /etc/hostname
Replace the contents with:
hooangf4t.lab
- Edit the
/etc/hostsfile:
sudo gedit /etc/hosts
Replace all lines containing the old hostname with:
127.0.0.1 hooangf4t.lab
- Restart the hostname service or the system:
sudo systemctl restart systemd-hostnamed
# Or restart the system
sudo reboot
Step 2: Set environment variables
Set the required environment variables for Ziti configuration:
- EXTERNAL_DNS:
export EXTERNAL_DNS="hooangf4t.lab"
- EXTERNAL_IP:
export EXTERNAL_IP="$(curl -s eth0.me)"
- ZITI_CTRL_EDGE_IP_OVERRIDE:
export ZITI_CTRL_EDGE_IP_OVERRIDE="${EXTERNAL_IP}"
- ZITI_CTRL_ADVERTISED_ADDRESS:
export ZITI_CTRL_ADVERTISED_ADDRESS="${EXTERNAL_DNS:-${EXTERNAL_IP}}"
- Port Configuration:
export ZITI_CTRL_ADVERTISED_PORT=8440
export ZITI_CTRL_EDGE_ADVERTISED_ADDRESS="${EXTERNAL_DNS:-${EXTERNAL_IP}}"
export ZITI_CTRL_EDGE_ADVERTISED_PORT=8441
export ZITI_ROUTER_ADVERTISED_ADDRESS="${EXTERNAL_DNS:-${EXTERNAL_IP}}"
export ZITI_ROUTER_IP_OVERRIDE="${EXTERNAL_IP}"
export ZITI_ROUTER_PORT=8442
Optional: Add these variables to .bashrc for persistence:
sudo gedit ~/.bashrc
Add at the end:
export EXTERNAL_DNS="hooangf4t.lab"
export EXTERNAL_IP="$(curl -s eth0.me)"
export ZITI_CTRL_EDGE_IP_OVERRIDE="${EXTERNAL_IP}"
export ZITI_CTRL_ADVERTISED_ADDRESS="${EXTERNAL_DNS:-${EXTERNAL_IP}}"
export ZITI_CTRL_ADVERTISED_PORT=8440
export ZITI_CTRL_EDGE_ADVERTISED_ADDRESS="${EXTERNAL_DNS:-${EXTERNAL_IP}}"
export ZITI_CTRL_EDGE_ADVERTISED_PORT=8441
export ZITI_ROUTER_ADVERTISED_ADDRESS="${EXTERNAL_DNS:-${EXTERNAL_IP}}"
export ZITI_ROUTER_IP_OVERRIDE="${EXTERNAL_IP}"
export ZITI_ROUTER_PORT=8442
Reload .bashrc :
source ~/.bashrc
Step 3: Run expressInstall
Install using the following command:
source /dev/stdin <<< "$(wget -qO- https://get.openziti.io/ziti-cli-functions.sh)"; expressInstall

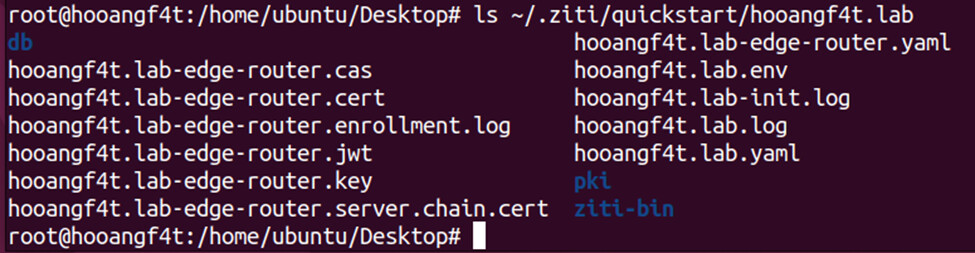
After installation, verify in the folder:
ls ~/.ziti/quickstart/$(hostname -s)
Step 4: Create systemd files for Controller and Router
Generate systemd files:
createControllerSystemdFile
createRouterSystemdFile "${ZITI_ROUTER_NAME}"
The generated files:
- Controller:
/root/.ziti/quickstart/hooangf4t.lab/hooangf4t.lab.service - Router:
/root/.ziti/quickstart/hooangf4t.lab/hooangf4t.lab-edge-router.service
Step 5: Stop running processes
Stop the helper scripts before using systemd:
stopRouter
stopController
Step 6: Install systemd files
Copy files to /etc/systemd/system/ :
sudo cp "${ZITI_HOME}/${ZITI_CTRL_NAME}.service" /etc/systemd/system/ziti-controller.service
sudo cp "${ZITI_HOME}/${ZITI_ROUTER_NAME}.service" /etc/systemd/system/ziti-router.service
sudo systemctl daemon-reload
sudo systemctl enable --now ziti-controller
sudo systemctl enable --now ziti-router
Step 7: Check service status
Verify Controller and Router services:
sudo systemctl -q status ziti-controller --lines=0 --no-pager
sudo systemctl -q status ziti-router --lines=0 --no-pager

Step 8: Reload environment variables
Reload .env file after logging back in:
source ~/.ziti/quickstart/$(hostname -s)/$(hostname -s).env
For example:
root@hooangf4t:/home/ubuntu/Desktop# source ~/.ziti/quickstart/hooangf4t.lab/hooangf4t.lab.env
root@hooangf4t:/home/ubuntu/Desktop# echo $ZITI_HOME
/root/.ziti/quickstart/hooangf4t.lab
Ziti Admin Panel
Step 1: Download ZAC from GitHub
wget https://github.com/openziti/ziti-console/releases/latest/download/ziti-console.zip
Step 2: Set the ZITI_HOME environment variable
Make sure that ZITI_HOME is set correctly, pointing to the quickstart working directory. You can reset the quickstart environment variables by running the following command:
source ${HOME}/.ziti/quickstart/$(hostname)/$(hostname).env
echo $ZITI_HOME

Step 3: Unzip Console
Unzip the ziti-console.zip file into the controller's working directory:
unzip -d ${ZITI_HOME}/console ./ziti-console.zip

Step 4: Update YAML configuration file
Open the configuration file ${ZITI_HOME}/$(hostname -s).yaml and add a web API binding for ZAC as follows:
gedit ~/.ziti/quickstart/hooangf4t.lab/hooangf4t.lab.yaml
- binding: zac
options:
location: ./console
indexFile: index.html
Step 5: Restart the Controller service
After changing the configuration, you need to restart the controller service for the changes to take effect. Use the following command to restart the ziti-controller service:
sudo systemctl restart ziti-controller.service
Step 6: Access ZAC via browser
You can now access ZAC through your web browser. Depending on the implementation, the management API port may differ:
- With "Local" quickstart, the default port is 1280.
- With the "Host OpenZiti Anywhere" quickstart, the default port is 8441 and can be configured as desired.
Access ZAC via the corresponding URL:
Now you can access ZAC to manage and monitor the components of the Ziti controller via the web interface.
controller configuration
$ZITI_HOME/hooangf4t.lab.yaml
v: 3

#trace:
#  path: "hooangf4t.lab.trace"

#profile:
#  memory:
#    path: ctrl.memprof


db:                     "/root/.ziti/quickstart/hooangf4t.lab/db/ctrl.db"
# uncomment and configure to enable HA
# raft:
#   dataDir:         "/root/.ziti/quickstart/hooangf4t.lab/raft"
#   minClusterSize:  1


identity:
  cert:        "/root/.ziti/quickstart/hooangf4t.lab/pki/hooangf4t.lab-intermediate/certs/hooangf4t.lab-client.chain.pem"
  server_cert: "/root/.ziti/quickstart/hooangf4t.lab/pki/hooangf4t.lab-intermediate/certs/hooangf4t.lab-server.chain.pem"
  key:         "/root/.ziti/quickstart/hooangf4t.lab/pki/hooangf4t.lab-intermediate/keys/hooangf4t.lab-server.key"
  ca:          "/root/.ziti/quickstart/hooangf4t.lab/pki/cas.pem"
  #alt_server_certs:
  #  - server_cert:  ""
  #    server_key:   ""

# trust domains may be overridden by SPIFFE ID as URI SAN
#trustDomain: ziti.example.com

# additional trust domains allow for migrating to a new trust domain
#additionalTrustDomains: []

# Network Configuration
#
# Configure how the controller will establish and manage the overlay network, and routing operations on top of
# the network.
#
#network:

  # routeTimeoutSeconds controls the number of seconds the controller will wait for a route attempt to succeed.
  #routeTimeoutSeconds:  10

  # createCircuitRetries controls the number of retries that will be attempted to create a path (and terminate it)
  # for new circuits.
  #createCircuitRetries: 2

  # pendingLinkTimeoutSeconds controls how long we'll wait before creating a new link between routers where
  # there isn't an established link, but a link request has been sent
  #pendingLinkTimeoutSeconds: 10

  # Defines the period that the controller re-evaluates the performance of all of the circuits
  # running on the network.
  #
  #cycleSeconds:         15

  # Sets router minimum cost. Defaults to 10
  #minRouterCost: 10

  # Sets how often a new control channel connection can take over for a router with an existing control channel connection
  # Defaults to 1 minute
  #routerConnectChurnLimit: 1m

  # Sets the latency of link when it's first created. Will be overwritten as soon as latency from the link is actually
  # reported from the routers. Defaults to 65 seconds.
  #initialLinkLatency: 65s

  #smart:
    #
    # Defines the fractional upper limit of underperforming circuits that are candidates to be re-routed. If
    # smart routing detects 100 circuits that are underperforming, and `smart.rerouteFraction` is set to `0.02`,
    # then the upper limit of circuits that will be re-routed in this `cycleSeconds` period will be limited to
    # 2 (2% of 100).
    #
    #rerouteFraction:    0.02
    #
    # Defines the hard upper limit of underperforming circuits that are candidates to be re-routed. If smart
    # routing detects 100 circuits that are underperforming, and `smart.rerouteCap` is set to `1`, and
    # `smart.rerouteFraction` is set to `0.02`, then the upper limit of circuits that will be re-routed in this
    # `cycleSeconds` period will be limited to 1.
    #
    #rerouteCap:         4

# the endpoint that routers will connect to the controller over.
ctrl:
  options:
    advertiseAddress: tls:hooangf4t.lab:8440
  # (optional) settings
  # set the maximum number of connect requests that are buffered and waiting to be acknowledged (1 to 5000, default 1)
  #maxQueuedConnects:      1
  # the maximum number of connects that have  begun hello synchronization (1 to 1000, default 16)
  #maxOutstandingConnects: 16
  # the number of milliseconds to wait before a hello synchronization fails and closes the connection (30ms to 60000ms, default: 5000ms)
  #connectTimeoutMs:       5000
  listener:             tls:0.0.0.0:8440

#metrics:
#  influxdb:
#    url:                http://localhost:8086
#    database:           ziti

# xctrl_example
#
#example:
#  enabled:              false
#  delay:                5s

healthChecks:
  boltCheck:
    # How often to try entering a bolt read tx. Defaults to 30 seconds
    interval: 30s
    # When to time out the check. Defaults to 20 seconds
    timeout: 20s
    # How long to wait before starting the check. Defaults to 30 seconds
    initialDelay: 30s

# By having an 'edge' section defined, the ziti-controller will attempt to parse the edge configuration. Removing this
# section, commenting out, or altering the name of the section will cause the edge to not run.
edge:
  # This section represents the configuration of the Edge API that is served over HTTPS
  api:
    #(optional, default 90s) Alters how frequently heartbeat and last activity values are persisted
    # activityUpdateInterval: 90s
    #(optional, default 250) The number of API Sessions updated for last activity per transaction
    # activityUpdateBatchSize: 250
    # sessionTimeout - optional, default 30m
    # The number of minutes before an Edge API session will time out. Timeouts are reset by
    # API requests and connections that are maintained to Edge Routers
    sessionTimeout: 30m
    # address - required
    # The default address (host:port) to use for enrollment for the Client API. This value must match one of the addresses
    # defined in this Controller.WebListener.'s bindPoints.
    address: hooangf4t.lab:8441
  # This section is used to define option that are used during enrollment of Edge Routers, Ziti Edge Identities.
  enrollment:
    # signingCert - required
    # A Ziti Identity configuration section that specifically makes use of the cert and key fields to define
    # a signing certificate from the PKI that the Ziti environment is using to sign certificates. The signingCert.cert
    # will be added to the /.well-known CA store that is used to bootstrap trust with the Ziti Controller.
    signingCert:
      cert: /root/.ziti/quickstart/hooangf4t.lab/pki/signing.pem
      key:  /root/.ziti/quickstart/hooangf4t.lab/pki/hooangf4t.lab-signing-intermediate/keys/hooangf4t.lab-signing-intermediate.key
    # edgeIdentity - optional
    # A section for identity enrollment specific settings
    edgeIdentity:
      # duration - optional, default 180m
      # The length of time that a Ziti Edge Identity enrollment should remain valid. After
      # this duration, the enrollment will expire and no longer be usable.
      duration: 180m
    # edgeRouter - Optional
    # A section for edge router enrollment specific settings.
    edgeRouter:
      # duration - optional, default 180m
      # The length of time that a Ziti Edge Router enrollment should remain valid. After
      # this duration, the enrollment will expire and no longer be usable.
      duration: 180m

# web
# Defines webListeners that will be hosted by the controller. Each webListener can host many APIs and be bound to many
# bind points.
web:
  # name - required
  # Provides a name for this listener, used for logging output. Not required to be unique, but is highly suggested.
  - name: client-management
    # bindPoints - required
    # One or more bind points are required. A bind point specifies an interface (interface:port string) that defines
    # where on the host machine the webListener will listen and the address (host:port) that should be used to
    # publicly address the webListener(i.e. mydomain.com, localhost, 127.0.0.1). This public address may be used for
    # incoming address resolution as well as used in responses in the API.
    bindPoints:
      #interface - required
      # A host:port string on which network interface to listen on. 0.0.0.0 will listen on all interfaces
      - interface: 0.0.0.0:8441
        # address - required
        # The public address that external incoming requests will be able to resolve. Used in request processing and
        # response content that requires full host:port/path addresses.
        address: hooangf4t.lab:8441
    # identity - optional
    # Allows the webListener to have a specific identity instead of defaulting to the root 'identity' section.
    identity:
      ca:          "/root/.ziti/quickstart/hooangf4t.lab/pki/hooangf4t.lab-edge-controller-root-ca/certs/hooangf4t.lab-edge-controller-root-ca.cert"
      key:         "/root/.ziti/quickstart/hooangf4t.lab/pki/hooangf4t.lab-edge-controller-intermediate/keys/hooangf4t.lab-server.key"
      server_cert: "/root/.ziti/quickstart/hooangf4t.lab/pki/hooangf4t.lab-edge-controller-intermediate/certs/hooangf4t.lab-server.chain.pem"
      cert:        "/root/.ziti/quickstart/hooangf4t.lab/pki/hooangf4t.lab-edge-controller-intermediate/certs/hooangf4t.lab-client.chain.pem"
      #alt_server_certs:
      #- server_cert: ""
      #  server_key:  ""

    # options - optional
    # Allows the specification of webListener level options - mainly dealing with HTTP/TLS settings. These options are
    # used for all http servers started by the current webListener.
    options:
      # idleTimeoutMs - optional, default 5000ms
      # The maximum amount of idle time in milliseconds allowed for pipelined HTTP requests. Setting this too high
      # can cause resources on the host to be consumed as clients remain connected and idle. Lowering this value
      # will cause clients to reconnect on subsequent HTTPs requests.
      idleTimeout: 5000ms  #http timeouts, new
      # readTimeoutMs - optional, default 5000ms
      # The maximum amount of time in milliseconds http servers will wait to read the first incoming requests. A higher
      # value risks consuming resources on the host with clients that are acting bad faith or suffering from high latency
      # or packet loss. A lower value can risk losing connections to high latency/packet loss clients.
      readTimeout: 5000ms
      # writeTimeoutMs - optional, default 100000ms
      # The total maximum time in milliseconds that the http server will wait for a single requests to be received and
      # responded too. A higher value can allow long-running requests to consume resources on the host. A lower value
      # can risk ending requests before the server has a chance to respond.
      writeTimeout: 100000ms
      # minTLSVersion - optional, default TLS1.2
      # The minimum version of TSL to support
      minTLSVersion: TLS1.2
      # maxTLSVersion - optional, default TLS1.3
      # The maximum version of TSL to support
      maxTLSVersion: TLS1.3
    # apis - required
    # Allows one or more APIs to be bound to this webListener
    apis:
      # binding - required
      # Specifies an API to bind to this webListener. Built-in APIs are
      #   - edge-management
      #   - edge-client
      #   - fabric-management
      - binding: edge-management
        # options - arg optional/required
        # This section is used to define values that are specified by the API they are associated with.
        # These settings are per API. The example below is for the 'edge-api' and contains both optional values and
        # required values.
        options: { }
      - binding: edge-client
        options: { }
      - binding: fabric
        options: { }
      - binding: zac
        options:
          location: ./console
          indexFile: index.html
router configuration
$ZITI_HOME/hooangf4t.lab-edge-router.yaml
v: 3

identity:
  cert:             "/root/.ziti/quickstart/hooangf4t.lab/hooangf4t.lab-edge-router.cert"
  server_cert:      "/root/.ziti/quickstart/hooangf4t.lab/hooangf4t.lab-edge-router.server.chain.cert"
  key:              "/root/.ziti/quickstart/hooangf4t.lab/hooangf4t.lab-edge-router.key"
  ca:               "/root/.ziti/quickstart/hooangf4t.lab/hooangf4t.lab-edge-router.cas"
  #alt_server_certs:
  #  - server_cert:  ""
  #    server_key:   ""

ctrl:
  endpoint:             tls:hooangf4t.lab:8440

link:
  dialers:
    - binding: transport
  listeners:
    - binding:          transport
      bind:             tls:0.0.0.0:10080
      advertise:        tls:hooangf4t.lab:10080
      options:
        outQueueSize:   4

listeners:
# bindings of edge and tunnel requires an "edge" section below
  - binding: edge
    address: tls:0.0.0.0:8442
    options:
      advertise: hooangf4t.lab:8442
      connectTimeoutMs: 5000
      getSessionTimeout: 60
  - binding: tunnel
    options:
      mode: host #tproxy|host


edge:
  csr:
    country: US
    province: NC
    locality: Charlotte
    organization: NetFoundry
    organizationalUnit: Ziti
    sans:
      dns:
        - localhost
        - hooangf4t.lab

      ip:
        - "127.0.0.1"
        - "::1"
        - "212.102.51.245"


#transport:
#  ws:
#    writeTimeout: 10
#    readTimeout: 5
#    idleTimeout: 120
#    pongTimeout: 60
#    pingInterval: 54
#    handshakeTimeout: 10
#    readBufferSize: 4096
#    writeBufferSize: 4096
#    enableCompression: true

forwarder:
  latencyProbeInterval: 0
  xgressDialQueueLength: 1000
  xgressDialWorkerCount: 128
  linkDialQueueLength: 1000
  linkDialWorkerCount: 32
Login and use ZAC
At this point, you should be able to navigate to: https://${ZITI_CTRL_EDGE_ADVERTISED_ADDRESS}:8441 and see the ZAC login screen. (The TLS warning your browser displays is normal - it's because these steps use a self-signed certificate generated during the installation process)


Add private router with OpenZiti quickstart network – I'm Learning
Youtube link
https://youtu.be/Bgl3w1m9NM4?si=-GK_UpFzF47lUGLG
Document link
Setup new edge router on a separate host
Set up network for private router ( another ubuntu machine connected with VMnet2 card to Controller machine)
Remember to update and install the necessary tools.


sudo apt update && sudo apt install -y curl git build-essential gedit dbus-x11 tar hostname jq
Checklist for connecting edge router to controller in OpenZiti:
- Check the controller address and port:
- Open the controller's configuration file to determine the value of
ZITI_EDGE_CTRL_ADVERTISED_HOST_PORT. - Use the following command to get the information:
- On private Router:
export ZITI_EDGE_CTRL_ADVERTISED_HOST_PORT="hooangf4t.lab:8441" - Make sure this address is accessible from the edge router (e.g. curl returns JSON):
curl -vsk -m 5 https://192.168.160.50:8441/ - Open the controller's configuration file to determine the value of

- Determine the Control Plane port:
- Make sure the edge router has access to the controller's Control Plane:
curl -vsk -m 5 https://hooangf4t.lab:8440/

Make sure controller and edge-router-1 are running:
curl -vsk -m 5 https://hooangf4t.lab:8440/

- Log in to controller:
- Use the following command to log in:
ziti edge login hooangf4t.lab:8441
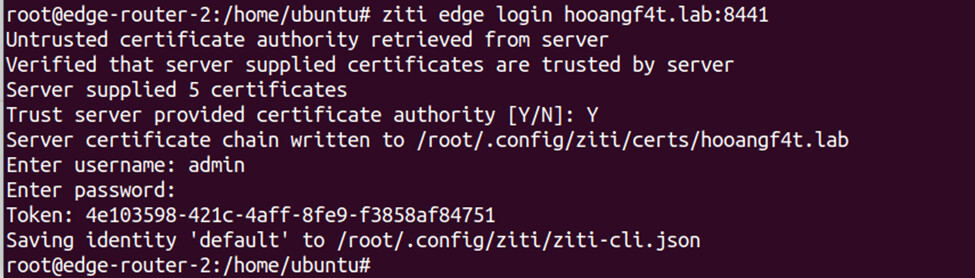
- Or use `zitiLogin` on a machine with a controller.
- Create Edge Router in controller:
- Run the following command to create the router:
ziti edge create edge-router -t ER2 -o $ZITI_HOME/ER2.jwt --tunneler-enabled

Set some variables, then decide whether this is a “private” or public border router (see below):
    export ROUTER_NAME=ER2
    export ZITI_CTRL_ADVERTISED_ADDRESS="hooangf4t.lab"
    export ZITI_CTRL_PORT=8440

    # optional - if you want to allow addressing by some specific IP

    export ZITI_EDGE_ROUTER_IP_OVERRIDE="192.168.220.20"
-
Create configuration file for Edge Router:
-
Decide whether this router will be "private" or "public":
- Public router: Can link to other routers.
- Private router: Does not advertise link information.
-
For example, if create "private" configuration:
ziti create config router edge --routerName $ROUTER_NAME \ --output $ZITI_HOME/$ROUTER_NAME.yaml \ --tunnelerMode host \ --private -
-
Edit the Edge Router configuration file (if necessary):
- Open the file
$ZITI_HOME/<router_name>.yaml. - Find the
ctrl.endpointsection and make sure the value points to the controller (for example):
ctrl:
  endpoint: tls:hooangf4t.lab:8440
File ER2.yaml hiện tại:
v: 3 identity: cert: "/root/.ziti/quickstart/edge-router-2/ER2.cert" server_cert: "/root/.ziti/quickstart/edge-router-2/ER2.server.chain.cert" key: "/root/.ziti/quickstart/edge-router-2/ER2.key" ca: "/root/.ziti/quickstart/edge-router-2/ER2.cas" ctrl: endpoint: tls:hooangf4t.lab:8440 listeners: - binding: edge address: tls:0.0.0.0:3022 options: advertise: edge-router-2:3022 connectTimeoutMs: 5000 getSessionTimeout: 60 - binding: tunnel options: mode: host edge: csr: country: US province: NC locality: Charlotte organization: NetFoundry organizationalUnit: Ziti sans: dns: - localhost - edge-router-2 ip: - "127.0.0.1" - "::1" forwarder: latencyProbeInterval: 0 xgressDialQueueLength: 1000 xgressDialWorkerCount: 128 linkDialQueueLength: 1000 linkDialWorkerCount: 32 - Open the file
-
Enroll Edge Router:
- Use the following command to register:
ziti-router enroll $ZITI_HOME/<router_name>.yaml --jwt $ZITI_HOME/<router_name>.jwt
I am having problem here, can't enroll router


Check the path and file name: Make sure that the `$ZITI_HOME` environment variable is set correctly and that the path to the `ER2.jwt` file is correct. You can check by:
```
echo $ZITI_HOME
ls $ZITI_HOME
```
-
Running Edge Router:
- Once done, launch Edge Router:
ziti-router run $ZITI_HOME/<router_name>.yaml -
Check the status of the Edge Router:
- Check if Edge Router is online:
ziti edge list edge-routers- Check the link between routers:
ziti fabric list links -
Configure Service Daemon (optional):
- Create service file for Edge Router:
createRouterSystemdFile <router_name>- Perform the daemon installation steps:
sudo cp $ZITI_HOME/<router_name>.service /etc/systemd/system/ziti-router.service
sudo systemctl daemon-reload
sudo systemctl enable --now ziti-router


